Showing posts with label Paper. Show all posts

Monday, October 17, 2011

For Your Party {Giveaway!!!}

We've moved to www.cupcakesandcutlery.com - you'll be redirected to this post in a moment.


I am just about ready to be lost in all kinds of party planning.  November through February are an entertaining whirlwind for me.  I've got 11 family birthdays, 3 holidays and whatever else I dream up to work on for the blog.  While we don't throw all out parties for each of these birthdays we like to do something special for each person.  What I love about For Your Party is that you can get custom napkins or other party paper items printed (in totally reasonable quantities) to help celebrate a special occasion without breaking your back planning an over the top gala.  Who wouldn't be excited to show up to a dinner in their honor and find a napkin, coaster or stir stick created just for them?  

For Your Party knows that you all have a lot going on this time of year and are giving away an awesome set of party goods to one lucky reader.

Giveaway includes: 


*50 Stir Sticks - For Your Party offers 3 styles/shapes to choose from and graphics and design are totally customizable. 


*50 Printed Coasters - 4 styles to choose from.  Winner can customize the look to suit their party needs. 


*50 Printed Cocktail Napkins in any color with customized message.

Winner can personalize the products with any choice of color, over 70 fonts, tons of shapes and message copy.  Or choose one of their ready made designs, all of which are super cool!  Take a minute to look around their site and see some examples, this will give you a ton of ideas of what they are capable of doing. 
  

Don't have any parties coming up?  Create something special for your family's Thanksgiving dinner.  

Photo Sources:
Stir Stick, napkin and coaster were created by me using the For Your Party site which is super easy to use to customize most of their products any way you want. 


Or use one of their "vintage inspired" themes for an upcoming baby shower you have to throw.  

Photo Sources:
Popcorn, cake stand, garland, mint tissue ball, green and white tissue pinwheel, drink, baby shower game card.  Umbrella napkin, stir stick and candy favor box created on the For Your Party site. 

The possibilities are virtually endless.  

To enter, leave a comment on this post telling me what event you will use the custom goods for.  I will choose one winner, at random.  Will accept comments until midnight, Monday, October 24, 2011 and announce the winner on Tuesday, October 25, 2011.

Follow For Your Party on Facebook for a 10% discount on your order!
Follow them on Twitter and check out their blog for more ideas on how to use their awesome products! 

Sharon
Photos of winning items care of For Your Party


Tuesday, July 19, 2011

The cutest cupcake topper printable ever and a yummy recipe too!

We've moved to www.cupcakesandcutlery.com - you'll be redirected to this post in a moment.


How adorable are these cupcake picks!  After Lauren created the cutest contest graphic ever (I am in love with every font she used in the Sweets for Teats title image) I asked her to also create a free printable of cupcake toppers for you to use along with your baked treats.  I LOVE that these fit right in with the theme of the party but could also be used for so many other types of party/holidays too.  And in order to take pictures of them, I needed to make a dessert to put them in, obvs.  Here is one of my favorite desserts my mom made for us growing up.  It is called Strawberry Dessert (that is what is on the printed recipe from the cookbook my mom put together for me of all our fave family (stolen from somewhere) recipes.)    


It is not the prettiest dessert I've ever seen.  So it is great that the 1" cupcake toppers can also be made in to a super easy cake banner to cute-ify the final product. 


If you are a regular reader of my blog you know that I am a lazy tutorialist and don't get too crazy with my photo staging.  I am also a lazy cook.  This recipe and "craft" is perfect for me.  Super cute, totally easy.  What you may not know is that I sometimes lack focus in the kitchen.  Many a recipe has gone awry because I like to not read recipes all the way through before I start.  The day I made this was no exception.  What should have taken about ten minutes to make, took me about an hour.  You may also have noticed that there is a Bigfoot hanging out with the ingredients.  This is my youngest son's new toy.  He is scared to death of it.  And loves it at the same time.  It is creating quite the internal struggle for him.  He wants the toy turned on (Bigfoot is awesome.  He does tricks including somersaults and throwing tantrums.  Did I mention he's loud too?) but once its on, my son will not get anywhere near him and ask me to turn him back off.  His battery was being charged in the kitchen and so I found myself moving Bigfoot around as I was trying to get the stuff together for this recipe.  Finally I just decided he was easier to include.  All you need for the dessert is a pre-made Angel Food Cake, a container of Cool Whip, Frozen Strawberries and Strawberry Jello, Bigfoot is optional.  Boom. My kind of recipe. 

FULL RECIPE AT END OF POST FOR THOSE OF YOU WHO WISH I WOULDN'T TALK SO MUCH. 


This is my houseguest/known since junior high friend, Kayla.  Oh and there is Bigfoot.  Kayla was highly offended by the fact that this dessert didn't have a more creative name.  She came up with Marilyn's (my mommy) Extraordinary Strawberry Parfait Casserole.  When my fancy friend, Taryn, saw the dessert she called it White Trash Strawberry Shortcake (since she makes her own shortcakes from scratch and may be a bit of a baking snob).  I decided to not punch her in the face and instead eat some dessert.  You decide which name you like better.     


First you take half of the Angel Food Cake and tear it in to chunks and put in the bottom of a 9 x 13 baking dish.  Next you dissolve the strawberry jello in boiling water and add the strawberries...


Now I want to bring you in to my world for a minute.  I hate ants.  Like, for real.  I don't tolerate them anywhere in the house but especially in the kitchen.  And wouldn't you know that as I began making this recipe, I started finding ants in this cabinet.  Cooking had to be put on hold as I took every item out of the cupboard, ant-chalked the shit out of it and left it open so I could have an ant stake-out.  So much for whatever focus I started with.  To top it off, many of my mom's recipes lack instructions.  See, she has common sense in the kitchen so she knows what to do.  Me?  Not so much.  


Which is why this part of the dessert ended up looking a little bit awful.  I think I curdled the Cool Whip.  But I will let you know right now that with all the chemicals in the Cool Whip, the flavor is not affected negatively at all.  That's a solid product right there; one that can stand up to kitchen messes and still come out pretty much unaffected.  You pour this mixture over your first layer of angel food cake, put a second layer of torn angel food cake on and then pour the rest of this amazing strawberry goo on top.  Chill.  Eat.  Repeat.


Here is the finished, chilled dessert.  So you can see why it needs a little decorating.  


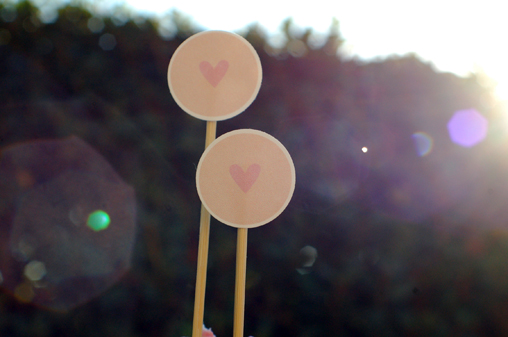
Here is all you need to make these adorable cupcake picks.  The download prints out a page of 48 one inch circles.  TomKat Studios suggest the EK Success punch so that is what I bought.  She wasn't kidding, best punch I've ever used! So run out and get one of those, use a punch you already have, or if all else fails, cut out the circle with scissors.  As you can see from the picture of the banner, I only used about 5 circles.  Not that time consuming.  And for the picks, you only need to cut out enough for each guest in attendance (or sometimes it is super cute to just have a few - adds pizazz, excites the guests and half the work!)

Cut the skewers with the scissors to whatever size you prefer.  Feel free to use toothpicks or some other type of stick.  I loved the thickness of the skewer with the proportion of the circle.  And I made these different heights to add visual interest.  I do stuff like that.  I'm all artsy.  Use your Glue Dots product of choice to adhere the cut out circle to the skewer.  I used both the Mini and Micro and both worked great.


I think they are so cute!!! Huge thanks to Lauren for creating them and letting me share them with you.  

To make the banner, all you would need is some ribbon, yarn, string, thread, you get the idea - as well as the above materials.  Simply tie the string to two uncut skewers and use the Glue Dots to adhere the circles right to the string.  

By the way, I am currently eating this dessert as my breakfast.  So. 


FULL RECIPE:
STRAWBERRY DESSERT AKA MARILYN'S EXTRAORDINARY STRAWBERRY PARFAIT CASSEROLE AKA WHITE TRASH STRAWBERRY SHORTCAKE

Ingredients
-1 ring store bought Angel Food Cake
-1 large package strawberry Jello
-1 small container Cool Whip THAWED (not the jumbo sized - a nice normal sized Cool Whip)
-1 large package sweetened frozen strawberries - NOT THAWED (these will have sugar and liquid - not the whole berries frozen in a bag)

Break 1/2 angel food cake into chunks and put in the bottom of a 9x13 pan.  Put Jello powder in a bowl, pour 2 cups boiling water on top and stir to dissolve.  Add frozen strawberries and stir to help thaw and cool down the Jello mixture.  Stir in spoonfuls of Cool Whip until mixed.  Spoon 1/2 mixture over cake. Repeat layers and set in fridge several hours to chill.  Cut in to squares to serve. 

Notes:  While the dessert holds its shape pretty well on a plate, it isn't quite stiff enough to use a knife to cut and serve. A spoon works much better.   


YOU HAVE UNTIL TONIGHT (TUESDAY, JULY 18, 2011 AT MIDNIGHT) TO ENTER TO WIN A PINK KITCHENAID MIXER SPONSORED BY DEL WEBB.  ENTER HERE!

Sharon
All pictures are mine.


Friday, May 6, 2011

Tiny Prints - Review

We've moved to www.cupcakesandcutlery.com - you'll be redirected to this post in a moment.


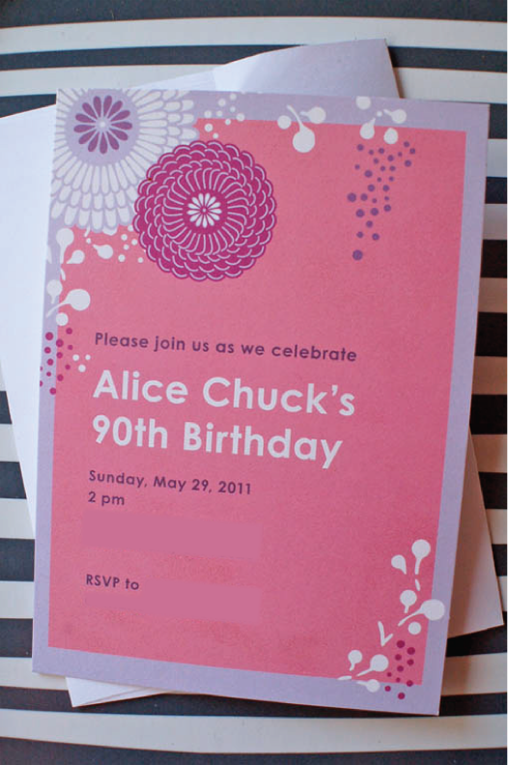
I was contacted recently by Tiny Prints to see if I would be interested in reviewing their cards.  I've known about them for years, but never had the right opportunity to use them before.  Until now.  My mother-in-law asked me to help her with a 90th birthday party for my husband's grandmother.  While I knew that Tiny Prints made adorable children's party invites and cool, modern Christmas cards, I wasn't sure what I would find in the way of adult invitations. 


I left the final decision making up to my mother-in-law (see the above) but found that they have a bunch of great options for adult invitations.  

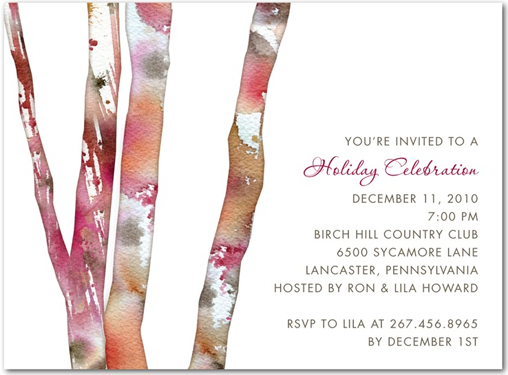
Image via Tiny Prints - Painted Trunks in Cabernet
Although they have this sampled as a holiday party, it was easily found under a heading for birthday party invitations for adults.

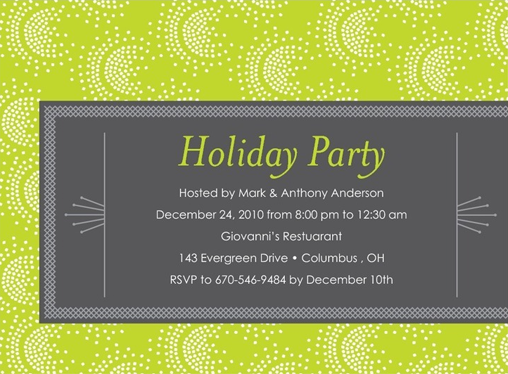
Image via Tiny Prints - Festive Fanfare Bright Green
Love how modern the green and grey is and love the offset detail box.
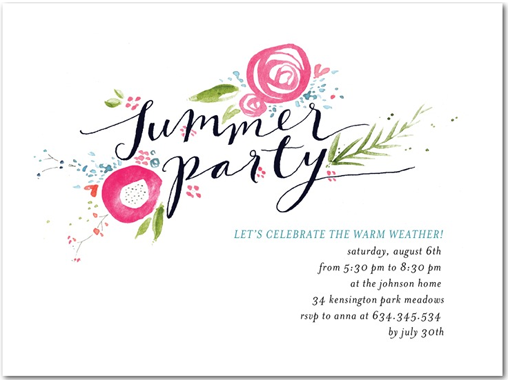
Image via Tiny Prints - Inspired Garden: Begonia
And how fantastical is this chic floral invite?! I love everything about it.
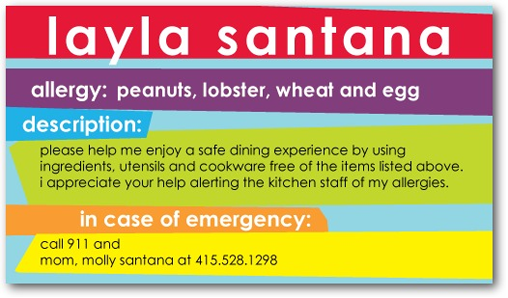
Image via Tiny Prints - Allergy Alert Cards, Bright Boxes: Sky
But I was pleasantly surprised when I came across these Allergy Alert cards.  As some of you may know, my oldest son has multiple food allergies.  And with him about to start kindergarten and us contemplating taking him on a trip back east this summer, these cards could really come in handy.  And there are 4 different styles to choose from.  RAD.IC.LE.

And I had no idea that they also had greeting cards.  I can't tell you how many times I have fretted over having to run out to buy a greeting card to get it in the mail on time.  Sometimes you just don't want to drag two kids over to Target, where there is a Lego section and where you could quite literally have two separate tantrums happening at once causing you to shed tears and sweat like a fat man.  Not saying that has happened...There are several ways they can help with the cards.  They can send them out for you and allow the card to arrive to the recipient faster and possibly on time for once in your life.  Or they can send the card to you, so you can personally sign it and then send it out from home.  Awesome.  And they also have business products, wedding invites and photo gifts.  Sheesh.  If Tiny Prints ran for prom queen she would probably win.  She's got it all. 

I had a little hiccup with my ordering.  I had saved a draft in a folder but then couldn't access it to put in my cart when I was ready to order.  I used the instant chat capability and within a minute I was chatting with a customer service rep and figured out the problem without having to grab the phone or wait to get an email back which may or may not have had the right answer.  I LOVE this option.  And once the order was placed, I received an email from a customer service rep.  She said that she had personally checked my order and sent it on to the printers.  There was a name and a phone number with an extension in case I had any questions or concerns.  What the what?!  That's customer service, people! 

I had an awesome experience with Tiny Prints and would certainly use them again.  I'm not sure why I continually fret over my novice graphic design capabilities and try to design all my own invites when there are professionals and designers who do it so much better and can be obtained with the click of the mouse.  

If you haven't used them yet, you should try them.  Don't get me started about the envelope options...

Sharon
top 2 photos are mine


Wednesday, May 4, 2011

Papel Picado-esque Straw Flags

We've moved to www.cupcakesandcutlery.com - you'll be redirected to this post in a moment.

Page Redirection If you are not redirected automatically, follow the Any Text Note Here

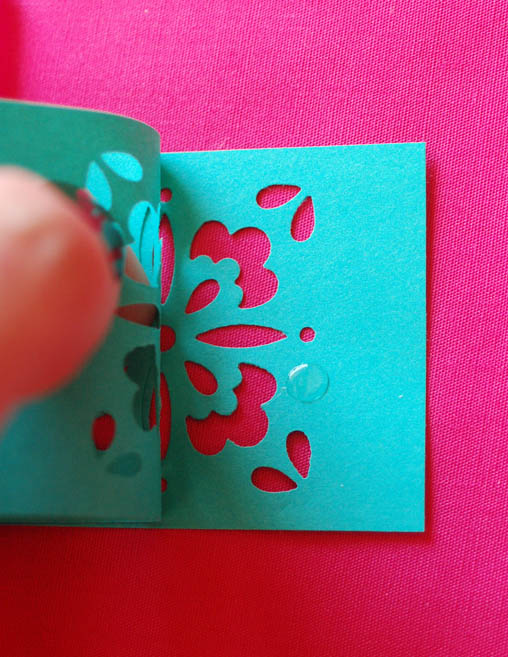
So I had this idea that I had to try out.  I love the papel picado flags that you sometimes see at fiestas.  They look super intricate and I wouldn't have the first clue, or patience, how to make the banners.  But I wondered about a mini version of it done as a straw flag.  Turned out pretty cute so I thought I would share.  Much like my cooking, my crafts tend to be a little less than precise.  And since my 2 year old decided he didn't need to nap today, there was extra activity around the craft table.  


Supplies:
Piece of paper
Paper cutter
scissors
Glue Dots Glue Lines
Glue Dots Craft
Glue Dots Mini Dots
A decorative Martha Stewart Anywhere punch
Straw


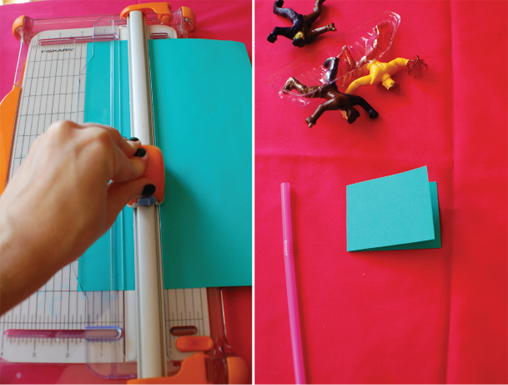
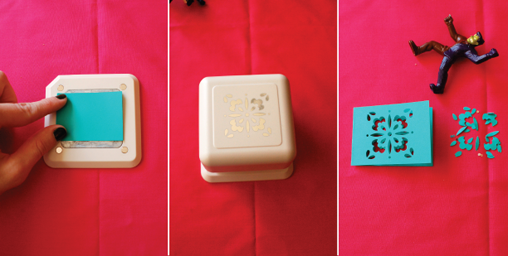
Cut a strip of paper to be 1 3/4" x 4 3/4" (this will depend on the decoration of the punch really).  Fold the paper in half.


Use the decorative punch making sure to allow for plenty of room for the straw near the fold.


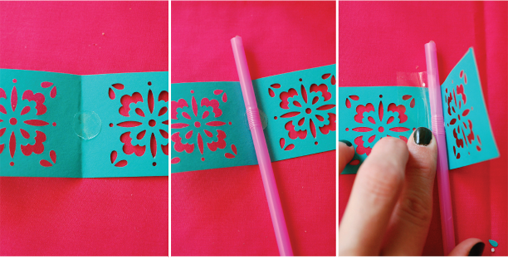
Place a Glue Dot Craft Dot in the center of the fold.  Secure the straw to the dot.  Add a Glue Dots Glue Line to one side of the straw.  You are going to need to match up the punch on both sides before you get the back side of the paper to adhere to the Glue Line.  


Use a Glue Dots Mini Dot near the edge to help line up the decoration. 


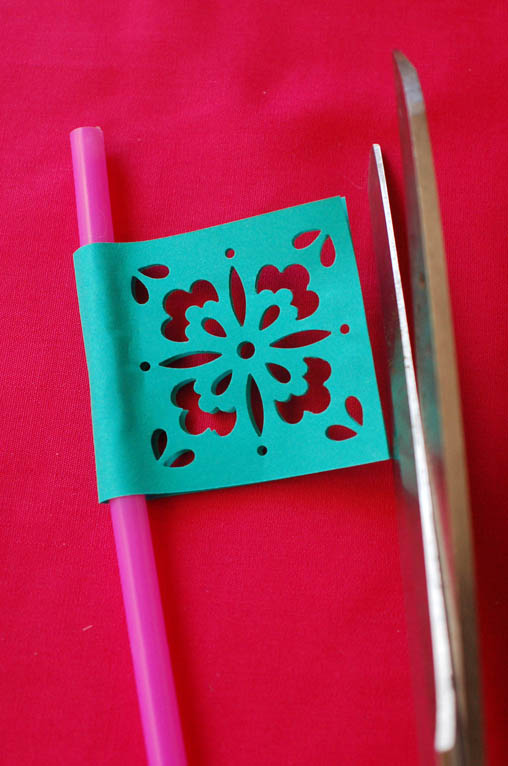
Trim the edge with scissors.  Insert in to beverage and enjoy.  While not a traditional Mexican folk pattern, the decorative cut outs still look pretty cool.  

Sharon
All photos are mine.  
Thursday, February 17, 2011

Hank and Hunt has new goodies!

We've moved to www.cupcakesandcutlery.com - you'll be redirected to this post in a moment.


Um.  Have you seen these new goodies from Hank and Hunt? Ridiculous.  Check out that metal cupcake stand!!!!!  What?!? And her printables...the ikat and confetti? Gingham! Sheer genius. Go buy them.  Right now.  Printies are like $5.  Less than Starbucks.  (ok, I never spend that much on a drink at Starbucks but I have to imagine that the big gulp size costs the same as a smart car).  So proud of Jenny and the products she is adding.  She is truly talented.  I want to be her when I grow up.

Sharon
image via Hank and Hunt.

Tuesday, January 25, 2011

Introducing Studio Lotus & November

We've moved to www.cupcakesandcutlery.com - you'll be redirected to this post in a moment.

I'm so excited to share with you the launch of Studio Lotus & November.  You sort of know Lisa already as I used one of her designs for my very first Inspiration Board Challenge.  At the time, she was in the process of setting up shop and it's finally done!
 Check out some of these super cute baby announcements!
 Need help with your business identity?  Studio Lotus & November can help!
 Lisa creates everything from party invites to full wedding invitation suites.
Looking for a personalized notecard or thank you note?  Look no further than Studio Lotus & November.

Check out her Etsy shop, but remember all her work is custom and specific to your event.  Don't hesitate to contact her with your inquiry.

Sharon

Saturday, January 22, 2011

Inspiration Board Challenge - January

We've moved to www.cupcakesandcutlery.com - you'll be redirected to this post in a moment.

Oh.  Is it January already?  How is it the 22nd of the month already and I am just getting the inspiration board challenge up?  But the bigger question is HOW DID I NOT KNOW HOW COOL JEN OF BLUSH PRINTABLES WAS?  I had seen a few examples of her work and liked what I saw.  But I didn't know about her blog.  She is freaking hilarious.  In an effort to learn a little about what makes her tick I read these posts.  And you know what I figured out?  She sounds like a heck of a good time.  Like, I want to invite her on a girl's weekend without even knowing her.  Even though she blares Tool on bad days and I blare early Hole, I think we have a ton of things in common.  Jen, I hope to meet you one day!
 From looking at her portfolio, you can tell this girl is super talented.  I love the way she balances romantic, vintage-y (totally a word) touches with a modern cleanness.
 Adoring this goldeny yellow with the pink.  And especially as a circus theme, the fact that it isn't primary colors delights me.
 And this one is soooooo creative and cool and funny (gush alert:) just like Jen.
This is the inspiration photo that I sent her.  These are silk flowers and I love that they tried to make it look like wallpaper but with actual, 3-D items.  I let her run with it, no rules, no specific event to create the board for.  I'm so excited to see what she comes up with.  I don't even really know what this is but I'm guessing it is European.  I think it might be an exhibit in a gallery/cafe space?  And I have no idea where I first saw it because my bookmark folder is as unorganized as the rest of my house.  If you posted this, please let me know!

And now a bit more about her blog.  It seriously rocks.  From party images that make you all dreamy to the fashion she shares (I want every pair of shoes she's ever posted about especially these) it is pure visual perfection.  Go look, if you haven't seen it.  Or was I the only one living under a rock?

Sharon

Friday, January 14, 2011

Paper Ribbon Tutorial

We've moved to www.cupcakesandcutlery.com - you'll be redirected to this post in a moment.

So, I'm pretty sure this is the first tutorial that I have done on my blog.  After you see these photos, you'll probably understand why.  I'm a crafty bonehead.  My crafts are not like others.  I am sloppy and unfinished and that is kind of how I like it (or else I have just gotten used to that...)  And I know you are all sick of hearing about the photoshoot/party we did using only magazine pages for decor.  And I know that Lauren already showed you the paper bow tutorial for paper ribbons that we put on wire.  These are how I made our placecards (by simply adding a stick to the back).  I made them with Glue Dots  and I think they are super versatile and I LOVE how they look.  I'm sure I'm not the first person to come up with this craft, but here is my version.

(above photo by Up Imagery)

Grab your supplies.  One magazine page will make several bows (the smaller the bows, the more you can make from one page).  The craft size Glue Dots are my fave.  I love them for crafting but I think I may love them even more for temporarily securing cake plates made out of vintage plates and candlesticks that I am not sure that I want to permanently marry (you all know the current divorce statistics...).  I use an old paper cutter that I stole from my mother ages ago and it could stand to have a blade replacement.  For each bow, you'll need 3 strips of paper that are the same size.  These are 1" x 5 1/4" I think (huh, how am I doing with this tutorial?  Can't even remember the dimensions to tell you.)

Make the "ends" part of the bow first by folding it over on itself in a diagonal.  I use a Glue Dot just to keep them flat.

 Next you'll make your "bows."  Put a Glue Dot at one end.

 Make the "loop" but don't match the ends up perfectly.  As you can see from the photos above, if you angle the top end, it gives a bit more dimension to the top of the bow.
 Make the second "loop", I trim the edges that stick out off both sides just to clean up the look a little.  Put a Glue Dot on the back of one.  Now attach it to the bow "ends".  I try to line up the corner of the "bow" with the inside corner of the "ends."
 The only thing left to do is decoratively trim the ends.  Boom.  A paper bow.

 Here is what it looks like when done with a thinner strip of paper.  I think I like this better than the big.

 Here I've used a traffic ticket to demonstrate the technique.  Even a moving violation looks cute as a paper bow.

Patterned scrapbook paper looks pretty darn cute as a paper bow.  It would look even cuter with double sided paper.  But I couldn't readily find any. (You've seen my garage...)

I want to thank Glue Dots for sending the supplies for our aforementioned shoot.  I have bunches leftover and will be using them up.  I guarantee.

I want to attempt making these paper ribbons into a garland.  It didn't fit in to this nap time but maybe one day soon.  Don't hold your breath.

Sharon

LinkWithin

Related Posts Plugin for WordPress, Blogger...