Showing posts with label Personalized. Show all posts

Wednesday, June 8, 2011

Ziggy Stardust Inspired Space 5th Birthday Party - Part 3

We've moved to www.cupcakesandcutlery.com - you'll be redirected to this post in a moment.


This post is picture heavy.  Be warned.  So the premise of the party was that O was inviting his friends over to be part of his space exploration team.  And since the first question I always ask when starting a new activity is "do I get a new outfit," I decided that I should make "uniforms" for each kid.  I created a store to be where they could get their new shirts, as well as accessorize it.  It would be another activity to engage the kids and also act as a favor "bar."
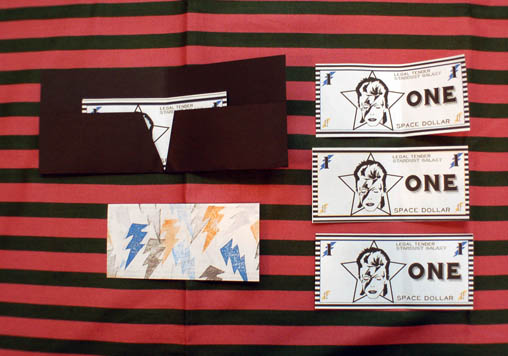
photo by me

I created wallets out of black card stock and designed space money.  The front features a well-known look of Ziggy Stardust and the back I created with a hand-made stamp that Lauren made for O. I had the wallets at the front door with the instruction to head right to the store to pick out their uniform.


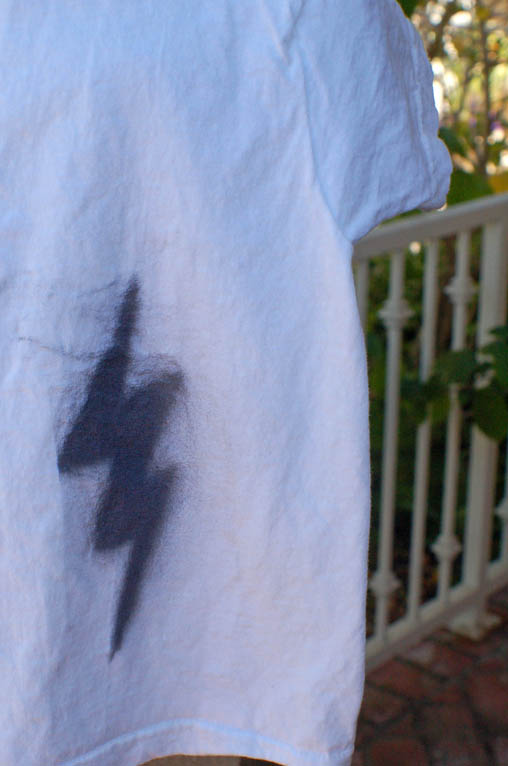
The uniforms.  I found cheap packs of Hanes white t's at Target and they came out to less than $2.00 a piece (way cheaper than the local craft stores...)  Then I used black spray paint or black fabric paints and home-made stencils to create different looks.  My intention had been to add trims to the shoulders but well, even I am not THAT crazy.  


I did add some to O's shirt (which was also gray so he would stand out a little more) and it turned out really cute. 
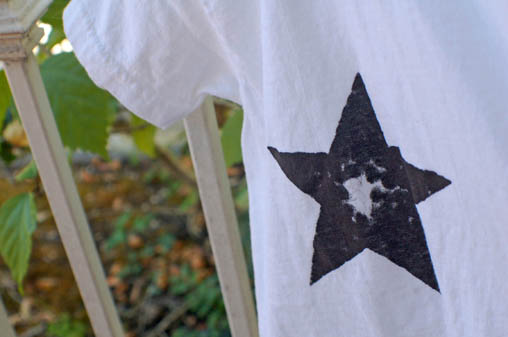
photo by me
photo by me
My kids wear the leftover shirts all the time.  They wash well and are kind of cool to boot. 


Since some of the designs were on the backs of the shirts, I wanted to make sure that each kid had a name tag on the front.  I used large foam craft letters and embellished with star shaped brads.


I asked my niece, P, to run the store.  I thought she would enjoy it and it would add a nice touch to the store atmosphere.  She took it super seriously.  My intention was to tell her that although each kid was given 7 space dollars, they could take as many things as they wanted as long as each kid got an accessory.  But in the craziness of party day I forgot to mention that to her...It wasn't until much later that I learned that she respects policy and procedure and held every kid firm at $7.  Which meant that a lot of the hand-made jewelry was left over...as well as tons of cheap loud or flying space toys...my bad. 


As Ziggy sported bright orange hair, I wanted the kids to get glam rock'd out if they chose.  I had these clip in hair braids for the girls and also gold and orange spray hair color for the boys.  


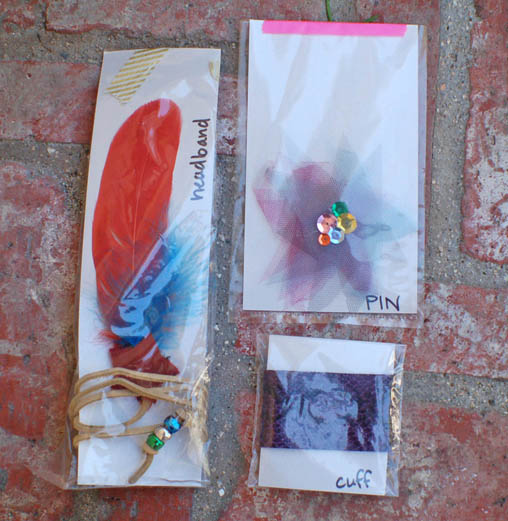
I made several types of headbands, bracelets, cuffs, barrettes, and pins for the kids to choose from.  This severely stretched my craft skill limits.  I may have turned to vices. 


photo by me

photo by me

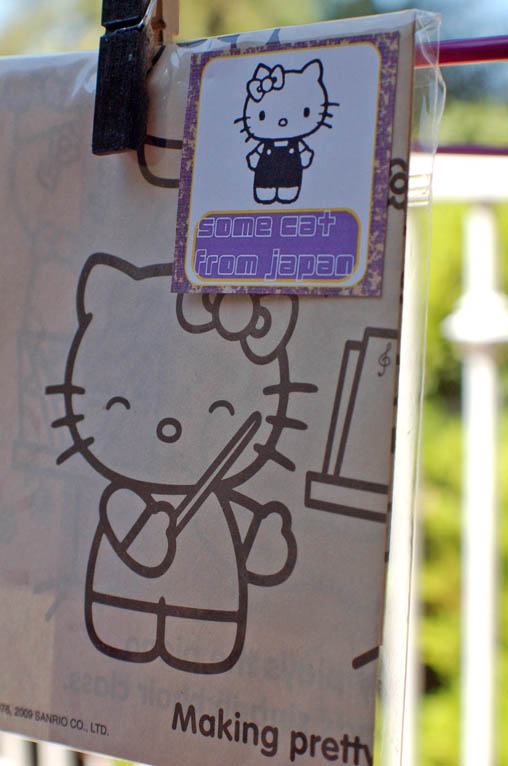
I tried to incorporate things in the party straight from song lyrics.  I'm not going to lie, there were only a few kid friendly lines.  I loved that I could work in coloring pages from everybody's favorite 'cat from Japan'.  I chose to use only that portion of the line as I couldn't figure out how to make 'well hung and snow white tan' appropriate for a children's party...
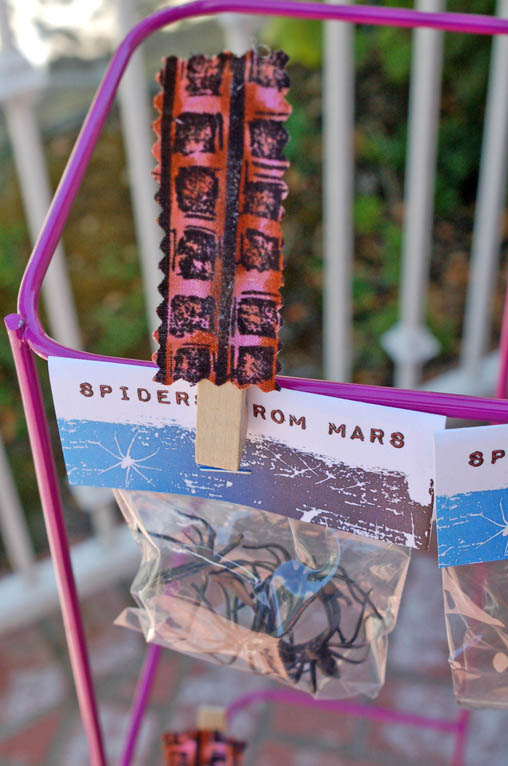
photo by me
And of course we had to have 'spiders from mars'.  {note - I use a lot of punctuation and grammatical errors in my posts.  On purpose.  I feel it sets me apart from those nerdy, good-at-school-and-other-important-stuff types}.*/~it"s


I used the same image of O from the invite on the favor bags provided by the store clerk.  How cute is that 'Oliver' stamp (also hand-made by Lauren).  


I made this sign for P to put up when she was done playing shop girl.  While I saw her run off a few brief times (and I was sent on Push Cake runs for her) she relished her role running that store.  At one point of the party, she ran up to me and handed me one of the favor bags.  I had no idea what it was so I opened it and peered in.  It was full of space money.  I looked back to her for explanation.  CASH DROP.  The girl took it upon herself to do a cash drop.  She's 8.  I am going to go ahead and write her a letter of recommendation now.  But I won't expect any freebies.  

Sharon

All photos, unless otherwise noted, are by Dez and Tam.  They are freaking radical people and seriously turned this mother out.  

And super huge shout out to my homegirl, Taryn.  She pawned her spawn off on a sitter to come over and help me package up some of these favors for the party.  She is awesome.  And a ridiculously big shout out to my mommy.  She helped me cut an Earth-crippling amount of space money (this is huge because an elementary school teacher commented on her sub-par cutting skills and she's never been able to shake it and I only slightly jest.)

Monday, May 9, 2011

Fabric Fringe Straw Flags with Glue Dots

We've moved to www.cupcakesandcutlery.com - you'll be redirected to this post in a moment.

Page Redirection If you are not redirected automatically, follow the Any Text Note Here

A few months ago I was asked to work on a special project for the new Glue Dots website.  I immediately asked Lauren of A Fabulous Fete to partner with me and we were off and running.  While the project is still in the works (and we can't wait to share it with you when it's ready!) we thought we would give you all a sneak peak (above) and provide some tutorials for several of the elements that we used. 


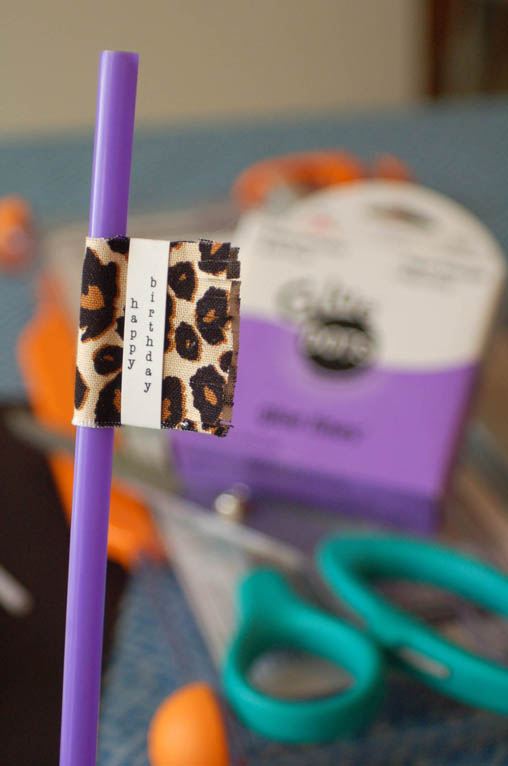
First up is this adorable fabric fringe straw flag.  I adore using fabric in my party decor.  It adds a great textural element and there seems to be an endless supply of colors and patterns to choose from at a very low cost.  I never expected the Glue Dots to work on fabric.  Lauren taught me otherwise.  And because I have a very heavy hand with the glue gun, I prefer to work with Glue Dots now, for many of my fabric projects.  Once in a while, the Glue Dot might not readily stick to the fabric.  With just a little extra pressure from your nail, it usually does the trick.  These straws, because of the personalization quality of the paper embellishment, can be modified to fit any occasion.  Let's do this.


Supplies:
Straw
Fabric (only a small piece is needed for each flag so total amount depends on how many flags you expect to make)
Paper
Paper Cutter
Scissors
Glue Dots Mini
Glue Dots Glue Lines


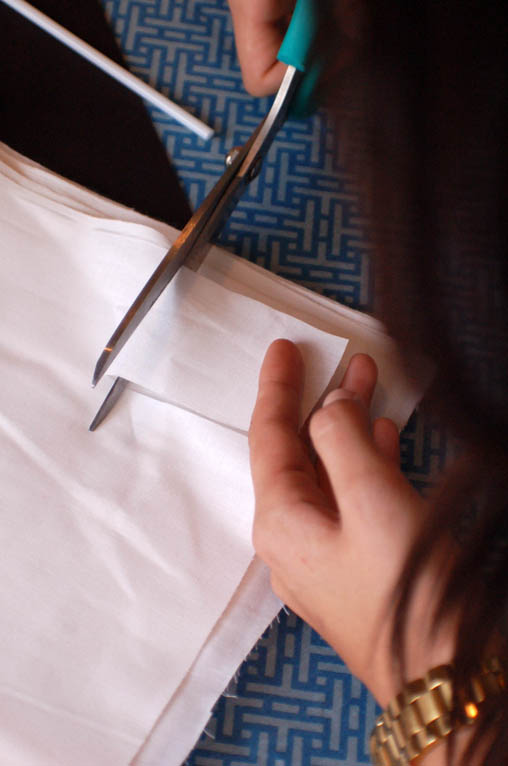
Begin by cutting a rectangle of fabric approximately 2" x 4".


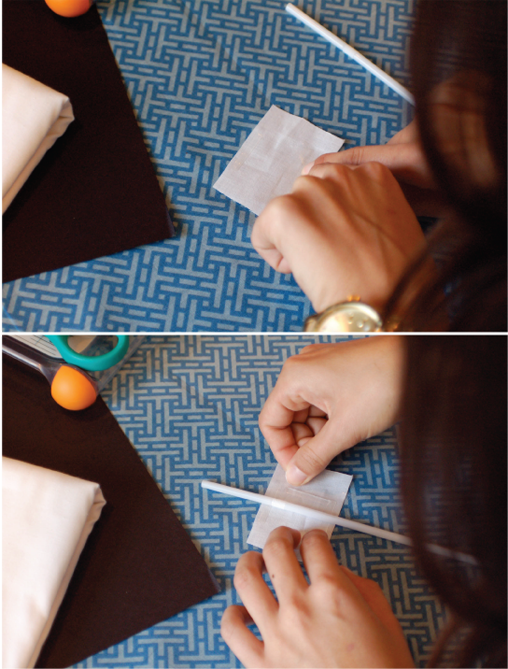
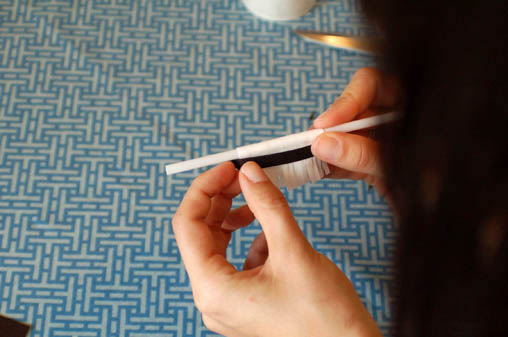
Set the rectangle in front of you with the longer sides at the top and bottom.  Use a Glue Dots Glue Line in the centers of the long sides along the top and bottom edges of the rectangles.  Place your straw in the center of the Glue Lines leaving about an 1 1/2" of the straw sticking out above the fabric.  Place a third Glue Line to one side of the straw.


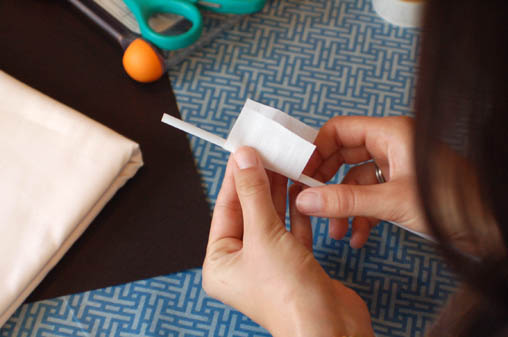
Fold the fabric around the straw and secure it to the Glue Line.


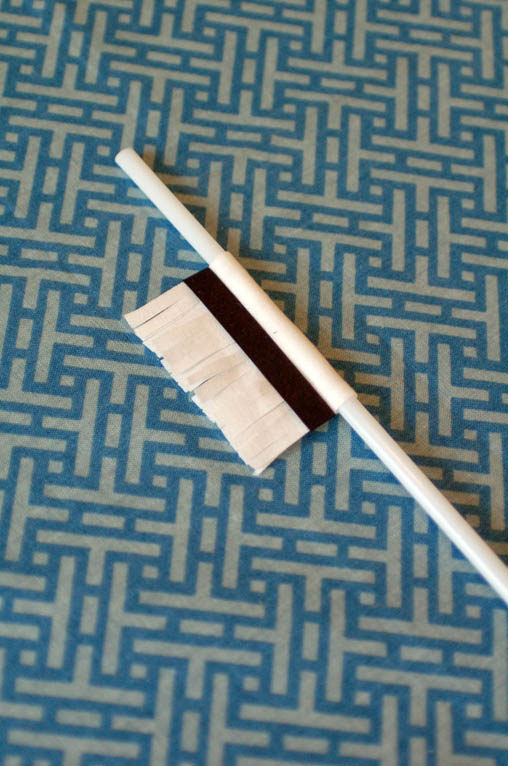
Trim the edge of the fabric to be even and then create the fringe by cutting the fabric at random intervals, fairly close together, perpendicular to the straw.  You can cut very short fringe, or longer fringe just try to keep the cuts consistent in length. 


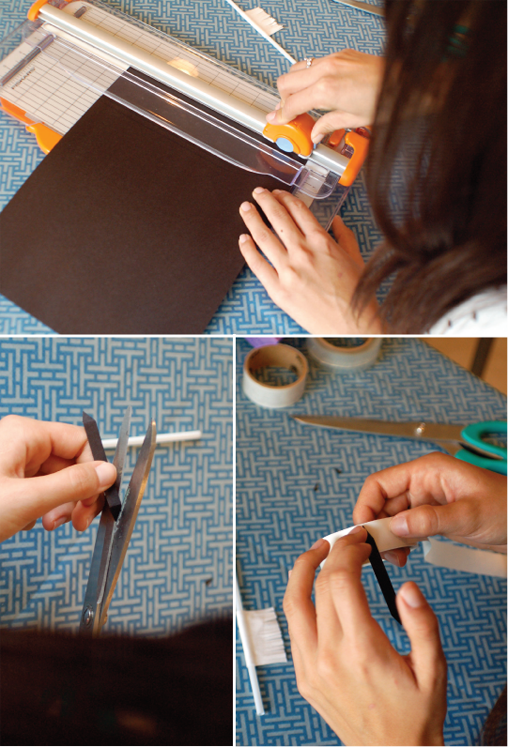
Next you will add your paper embellishment.  Here we just used a solid colored paper.  But this is your opportunity to really add some personalization.  Print out a sentiment on normal printer paper (no cardstock needed) and then cut it as we've done here.  Cut the strip approximately 1/4" x 2 1/2".  Cut the ends into points.  Next, center the strip on top of your flag and fold the ends towards the bag.  Use Glue Dots Mini Dots (one on the back of each pointed end) and a Glue Line on the back of the strip. 


Adhere to the fabric straw flag. 


And there you have it.  Super simple, but a great statement maker at your next party. 

Check out Lauren's blog tomorrow and Thursday for more tutorials and I'll have another one up on Wednesday.  

*We received Glue Dots products for participating in the project.  And I love them. 

Sharon
All photos are mine. 


Friday, May 6, 2011

Tiny Prints - Review

We've moved to www.cupcakesandcutlery.com - you'll be redirected to this post in a moment.


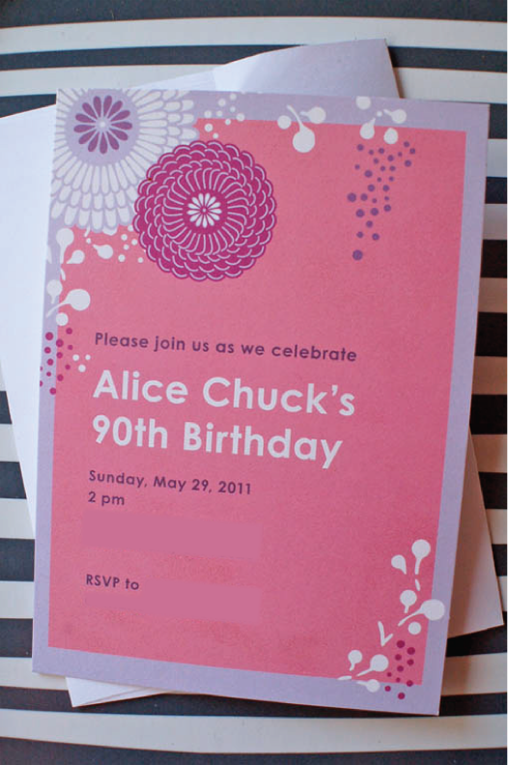
I was contacted recently by Tiny Prints to see if I would be interested in reviewing their cards.  I've known about them for years, but never had the right opportunity to use them before.  Until now.  My mother-in-law asked me to help her with a 90th birthday party for my husband's grandmother.  While I knew that Tiny Prints made adorable children's party invites and cool, modern Christmas cards, I wasn't sure what I would find in the way of adult invitations. 


I left the final decision making up to my mother-in-law (see the above) but found that they have a bunch of great options for adult invitations.  

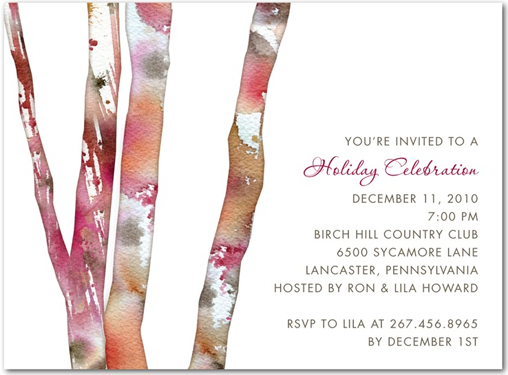
Image via Tiny Prints - Painted Trunks in Cabernet
Although they have this sampled as a holiday party, it was easily found under a heading for birthday party invitations for adults.

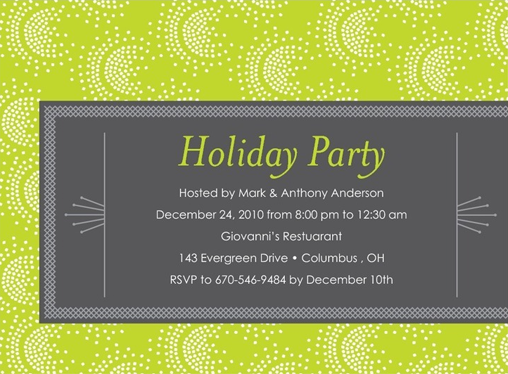
Image via Tiny Prints - Festive Fanfare Bright Green
Love how modern the green and grey is and love the offset detail box.
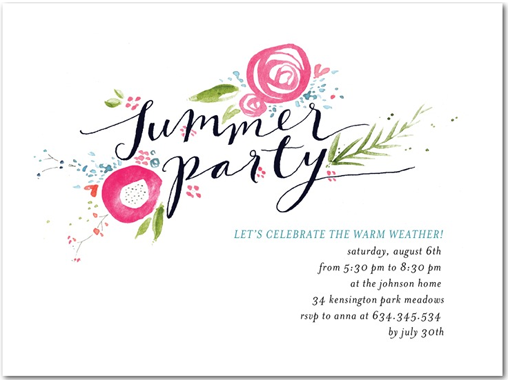
Image via Tiny Prints - Inspired Garden: Begonia
And how fantastical is this chic floral invite?! I love everything about it.
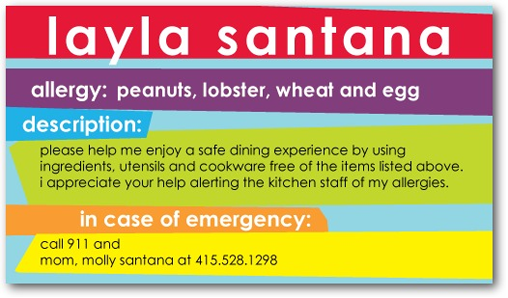
Image via Tiny Prints - Allergy Alert Cards, Bright Boxes: Sky
But I was pleasantly surprised when I came across these Allergy Alert cards.  As some of you may know, my oldest son has multiple food allergies.  And with him about to start kindergarten and us contemplating taking him on a trip back east this summer, these cards could really come in handy.  And there are 4 different styles to choose from.  RAD.IC.LE.

And I had no idea that they also had greeting cards.  I can't tell you how many times I have fretted over having to run out to buy a greeting card to get it in the mail on time.  Sometimes you just don't want to drag two kids over to Target, where there is a Lego section and where you could quite literally have two separate tantrums happening at once causing you to shed tears and sweat like a fat man.  Not saying that has happened...There are several ways they can help with the cards.  They can send them out for you and allow the card to arrive to the recipient faster and possibly on time for once in your life.  Or they can send the card to you, so you can personally sign it and then send it out from home.  Awesome.  And they also have business products, wedding invites and photo gifts.  Sheesh.  If Tiny Prints ran for prom queen she would probably win.  She's got it all. 

I had a little hiccup with my ordering.  I had saved a draft in a folder but then couldn't access it to put in my cart when I was ready to order.  I used the instant chat capability and within a minute I was chatting with a customer service rep and figured out the problem without having to grab the phone or wait to get an email back which may or may not have had the right answer.  I LOVE this option.  And once the order was placed, I received an email from a customer service rep.  She said that she had personally checked my order and sent it on to the printers.  There was a name and a phone number with an extension in case I had any questions or concerns.  What the what?!  That's customer service, people! 

I had an awesome experience with Tiny Prints and would certainly use them again.  I'm not sure why I continually fret over my novice graphic design capabilities and try to design all my own invites when there are professionals and designers who do it so much better and can be obtained with the click of the mouse.  

If you haven't used them yet, you should try them.  Don't get me started about the envelope options...

Sharon
top 2 photos are mine


Tuesday, January 25, 2011

Introducing Studio Lotus & November

We've moved to www.cupcakesandcutlery.com - you'll be redirected to this post in a moment.

I'm so excited to share with you the launch of Studio Lotus & November.  You sort of know Lisa already as I used one of her designs for my very first Inspiration Board Challenge.  At the time, she was in the process of setting up shop and it's finally done!
 Check out some of these super cute baby announcements!
 Need help with your business identity?  Studio Lotus & November can help!
 Lisa creates everything from party invites to full wedding invitation suites.
Looking for a personalized notecard or thank you note?  Look no further than Studio Lotus & November.

Check out her Etsy shop, but remember all her work is custom and specific to your event.  Don't hesitate to contact her with your inquiry.

Sharon

Saturday, January 22, 2011

Inspiration Board Challenge - January

We've moved to www.cupcakesandcutlery.com - you'll be redirected to this post in a moment.

Oh.  Is it January already?  How is it the 22nd of the month already and I am just getting the inspiration board challenge up?  But the bigger question is HOW DID I NOT KNOW HOW COOL JEN OF BLUSH PRINTABLES WAS?  I had seen a few examples of her work and liked what I saw.  But I didn't know about her blog.  She is freaking hilarious.  In an effort to learn a little about what makes her tick I read these posts.  And you know what I figured out?  She sounds like a heck of a good time.  Like, I want to invite her on a girl's weekend without even knowing her.  Even though she blares Tool on bad days and I blare early Hole, I think we have a ton of things in common.  Jen, I hope to meet you one day!
 From looking at her portfolio, you can tell this girl is super talented.  I love the way she balances romantic, vintage-y (totally a word) touches with a modern cleanness.
 Adoring this goldeny yellow with the pink.  And especially as a circus theme, the fact that it isn't primary colors delights me.
 And this one is soooooo creative and cool and funny (gush alert:) just like Jen.
This is the inspiration photo that I sent her.  These are silk flowers and I love that they tried to make it look like wallpaper but with actual, 3-D items.  I let her run with it, no rules, no specific event to create the board for.  I'm so excited to see what she comes up with.  I don't even really know what this is but I'm guessing it is European.  I think it might be an exhibit in a gallery/cafe space?  And I have no idea where I first saw it because my bookmark folder is as unorganized as the rest of my house.  If you posted this, please let me know!

And now a bit more about her blog.  It seriously rocks.  From party images that make you all dreamy to the fashion she shares (I want every pair of shoes she's ever posted about especially these) it is pure visual perfection.  Go look, if you haven't seen it.  Or was I the only one living under a rock?

Sharon

Monday, October 11, 2010

Stylecology - Plan your next party in style

We've moved to www.cupcakesandcutlery.com - you'll be redirected to this post in a moment.

Stylecology is an online store that offers stylish and unique accessories, gifts and products for every phase of life but also is the perfect place to browse for your wedding supplies. They have a variety of hostess and baby gift options, jewelry, home decor and more but it is also a place I bet you haven't thought to look when designing a party.

Their wedding section is ripe with great party items. Sure, you might not need table numbers for your next fete but these darling peacock seals and favor tags are a must. (other styles available) Set of 25 for $42.

Who doesn't love this old-fashioned one gallon candy jar? So cute. And the price at $13.32 (price break at 4) is very reasonable. Compared to how much some places charge for the apothecary jars, this is a steal! Oh and Stylecology sells some bulk candy too (by color!).

This glass plate ($29) is billed as a sign-on guest plate. I think it would make a perfect serving tray. Could this by my next inspiration board challenge piece? Because my head is swimming with possibilities.

Looking for personalized ribbon? You can find it here a bevy of colors. Not only can you take care of favors for your bridal shower or bachelorette party, but you can also package them up beautifully. They have dozens of options for boxes and bags but I'm partial to their small cloth bags. So cute!

Ribbon wands ($5.50 each), created by Mary Dann, aren't just for weddings any more. They come in several colors and I happen to know several little girls who love to have these at their next birthday parties.
These votive wraps $2.29 each (set of 24) are a stylish option for adding a little special touch to your event. The available designs are very.

There are great baby gifts, items you are going to want for your home, the most beautiful wrapped soaps. This post doesn't even begin to showcase all that Stylecology has to offer. Check them out for yourself.

Follow them on twitter (@Stylecology) for daily discounts.

Sharon

All photos via Stylecology


LinkWithin

Related Posts Plugin for WordPress, Blogger...